Friday was my day to explore the quilt show. My sister lives in Orange County and came up to spend most of the day with me, visiting the vendor booths and viewing the show. That evening I took Jeni Baker's Creative HST Piecing Class.
The class focused on techniques in Jeni's book, Patchwork Essentials: The Half-Square Triangle. She brought in a variety of fun and interesting examples (that you'd have thought I would have taken photos of!) to get our creative juices flowing. After a short intro into the many different options for doing something different with HSTs, Jeni gave us a ton of time to sew. As we worked, she walked the room checking in with everyone about what they were working on and assisting as needed. Jeni was delightful and encouraging.
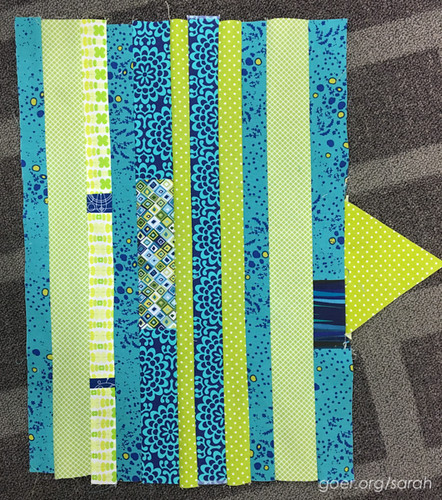
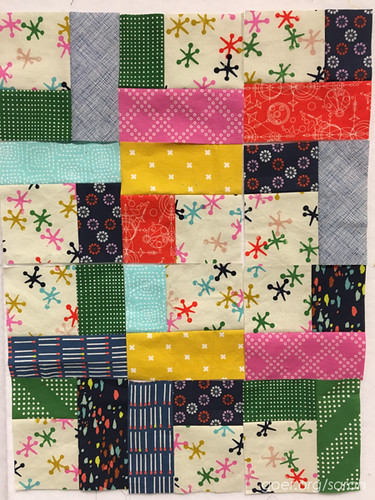
I chose to work with my Swoon scraps, because quite frankly, they are my favorite color palette at the moment. Most of my fabrics were in strips, so I began by piecing a large slab of mostly strips. The strips that were pieced from multiple pieces of fabric were necessitated by using smaller scraps. (That wonky triangle attached to the right side was just so I'd be able to cut out my third square.)
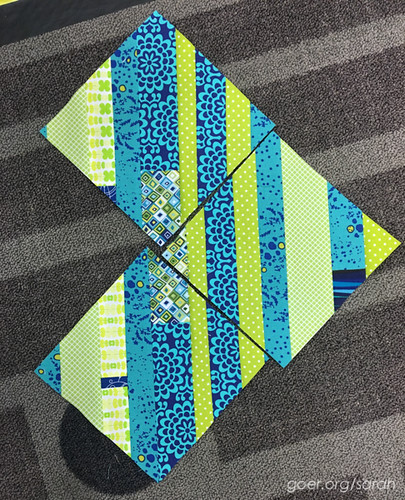
Once my slab was created I cut three 6.5" squares (mostly because I had a 6.5" square ruler with me) on point from the slab. I have some usable sections left, but without further piecing, three was the max I could get out of my slab.
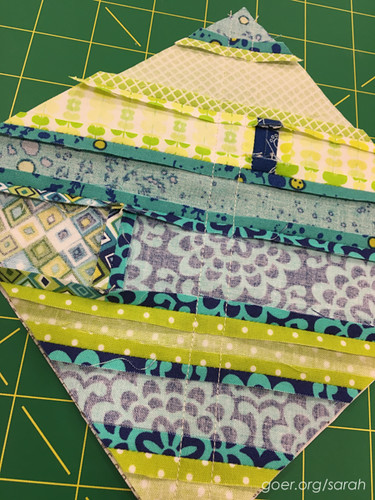
Then I paired these pieced squares with 6.5" squares of my white text fabric to make half square triangles. These were made using the two at a time method of marking the diagonal and sewing 1/4" on either side of it.

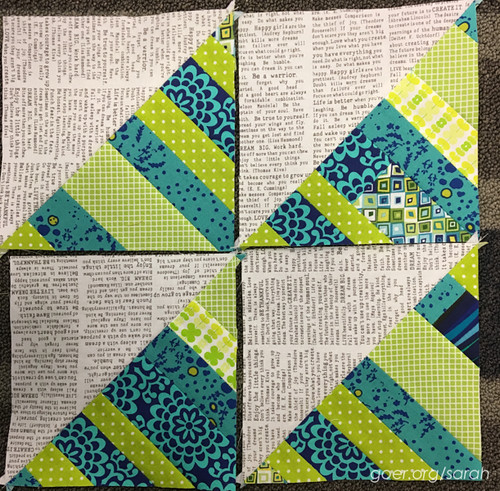
Finally I used navy squares paired with the above HSTs to make these units, using the same method as the previous step. From my initial three squares cut from my slab I'll have twelve of these units, but I ran out of time and navy fabric for making more during class. I'm looking forward to finishing these twelve and continuing further with this project.
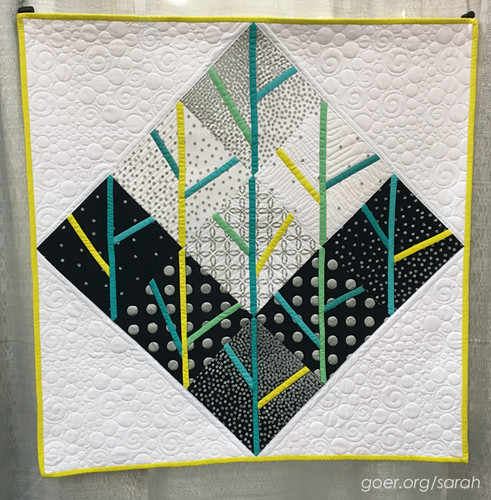
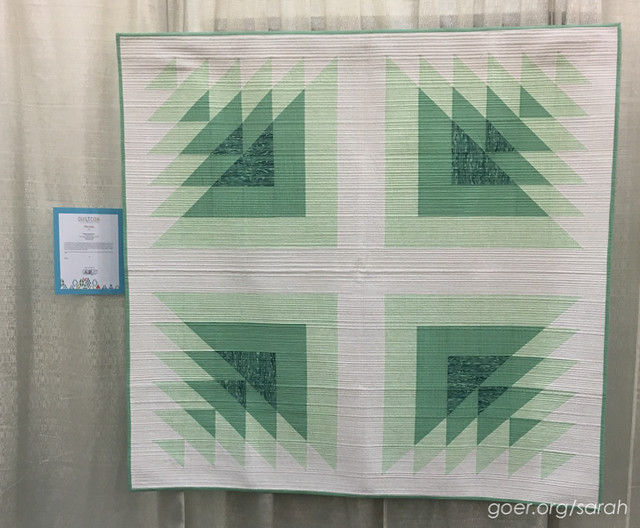
Today I'm sharing a couple of my favorites from the show that featured transparency. I love the play with fabrics to achieve this look. It's a bit of an optical illusion. First, from the Piecing category, Triangle Transparency by Yvonne Fuchs. I love her large-scale, graphic design. Her artist statement reads:
As a Quilt Design a Day (QDAD) participant, one of the challenge prompts is to try to use transparency in your design. Triangle Transparency was one of my earliest QDAD designs, because the color palette for the day worked well with transparency play. I carefully curated a group of modern fabrics to turn the design into reality. My goal with the quilt is to show how powerful modern tonal prints can be when used in a large, graphic design meant to emphasize dramatic color play.
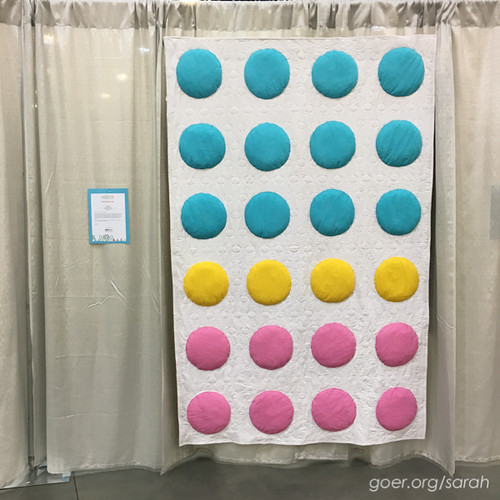
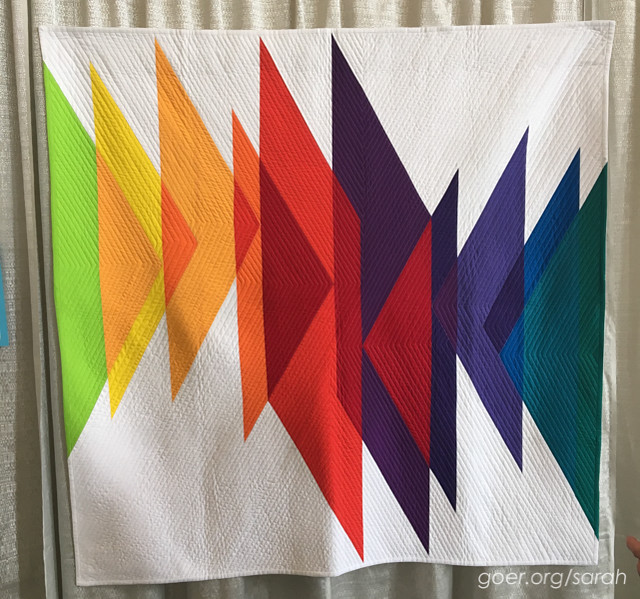
This next one had the added draw of a rainbow of color. I love how the quilting added to the design of the piecing. Color Study (Triangles) in the Use of Negative Space category is by Erika Mulvenna. Her artist statement reads:
I first studied Color Theory as a painting student, following exercises in mixing pigments to learn about color principles and interactions.
The inspiration for this piece comes directly from one of those primary Color Theory exercises; use the 12 colors of the Artist's Color Wheel to create a subjective color model. Red, my favorite color, is centered in the design. As the shapes intersect, the 12 colors of the wheel move back and forth out to the very edges.
Creating this design with fabric was a challenge. After experimenting with several piecing techniques, I used a large-scale foundation piecing method.
Giveaway *closed*
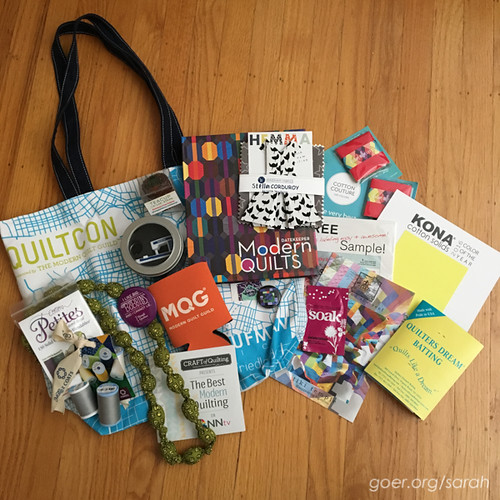
I'm sharing some of my goodies from QuiltCon with one of you. I'll draw one winner on March 24th at 1pm PST out of all entries on my five posts about my QuiltCon classes. (This is the third of the five posts.) The drawing is open to everyone. To enter, please comment below and tell me your favorite quilting book. Followers can get a second entry by posting a second comment to tell me how you follow me (Bloglovin', Instagram, etc.). Thank you! Thank you to everyone who entered. The winner is Anja of Anja Quilts!