Tag Archives: placemat

10 Comments

The first Project QUILTING challenge of season 14 is The First One.

I am a habitual overthinker. I have a list of things I'd like to work into my PQ challenges this season and none of them were the "perfect" fit for this challenge. So the options to meet The First One theme seemed infinite. I brainstormed some ideas and considerations with my daughter:

  • my first quilt
  • my first blog post
  • my first IG post
  • red, the first color in a rainbow
  • the letter A
  • the number 1
  • the first PQ challenge I participated in, PQ 8.1
  • fabrics from my first PQ project
  • the very first PQ challenge
  • my favorite fabric designer, Alison Glass
  • my first Alison Glass Sun Prints (as seen in this 2015 mini I made)
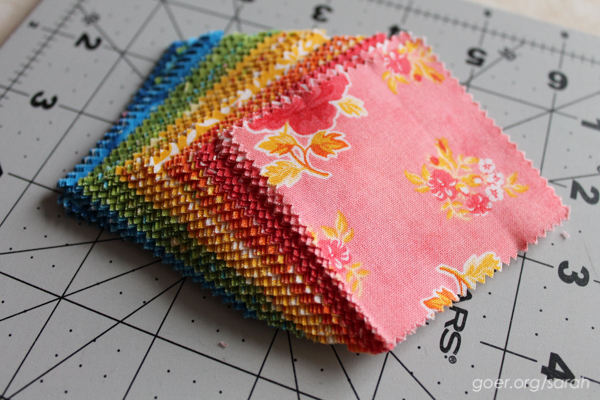
  • my favorite print from Alison Glass Sunprints 2015, Grove

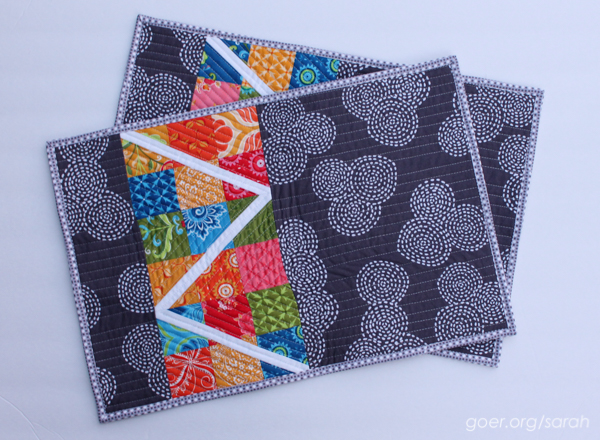
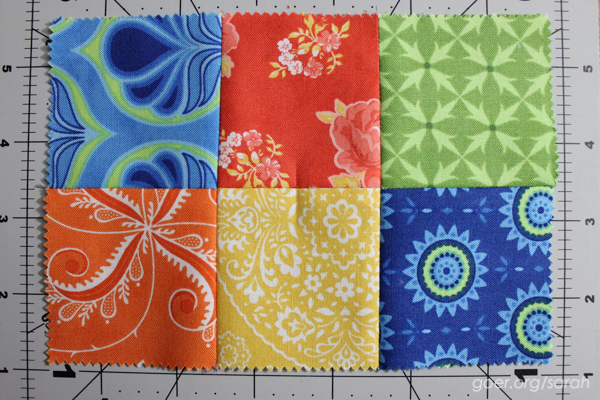
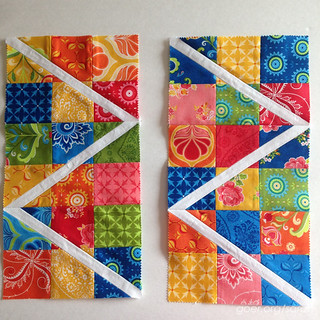
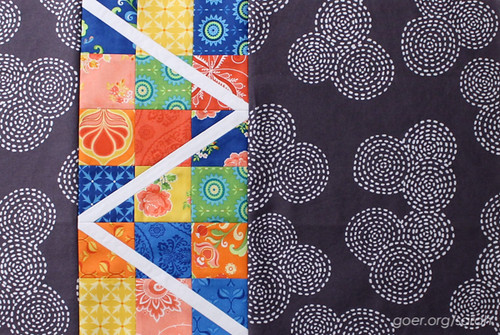
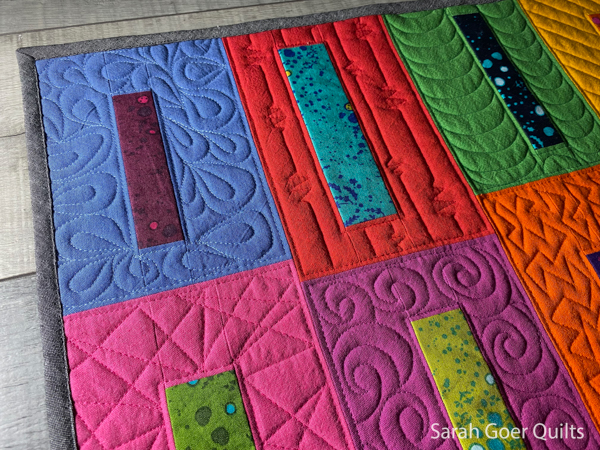
Taking all these things into consideration, I chose the purple Grove Sun Print as the first fabric for this project... my Sun Prints are precious, rarely used fabrics in my stash. And this print was used in my first Project QUILTING project way back in 2017. I decided I would improv piece some simple 1s, using each of the Grove prints... which happens to be in 8 color ways, a nod to my participation in PQ since season 8. I looked back at what the very first Project QUILTING challenge was, way before I had heard of the challenges... rectangles! Ya know what really simple 1s look like? Rectangles!

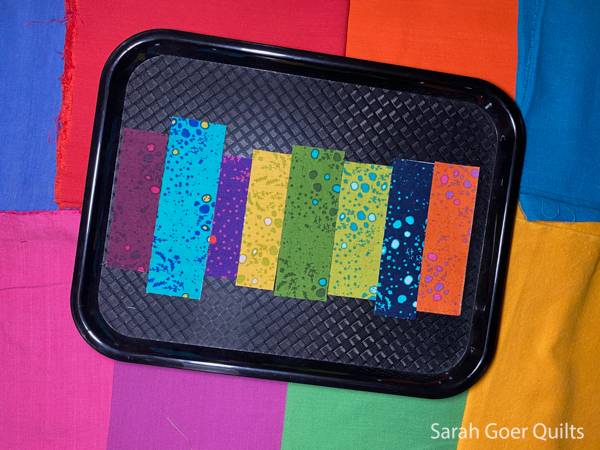
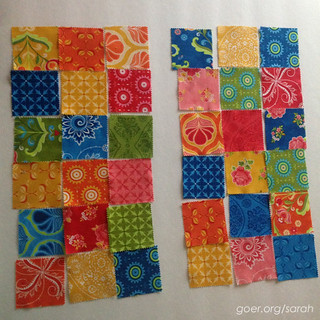
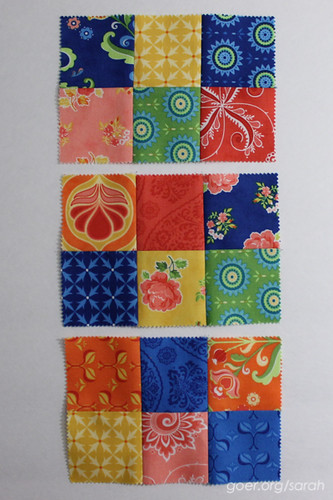
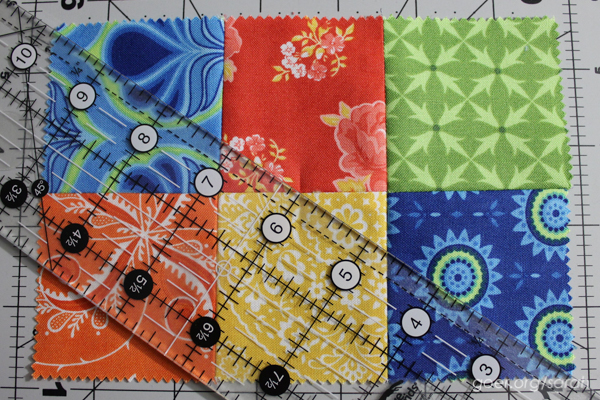
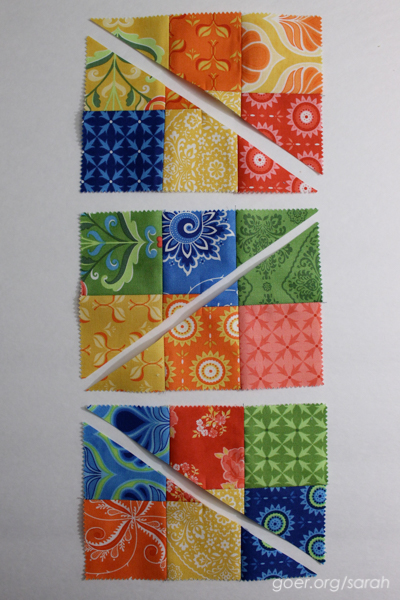
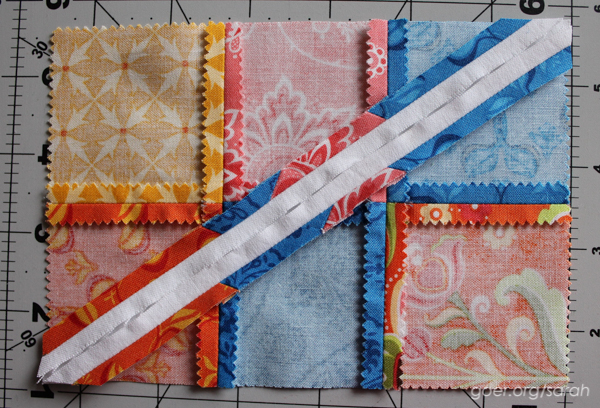
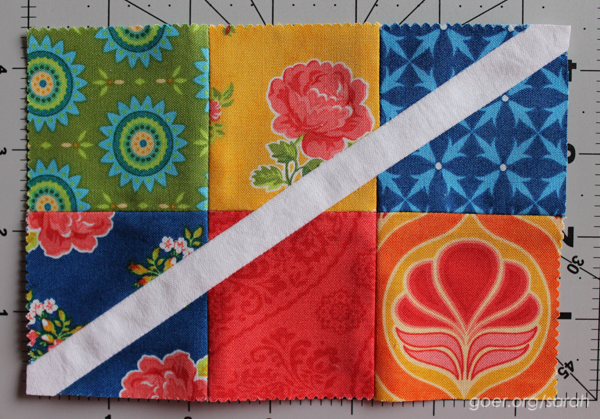
I started by cutting my rectangular number ones from my scraps. The size of my fabric scraps dictated the size of my rectangles. From here, I oversized each section of my quilt when I pieced the background to surround each rectangle and trimmed down when I puzzled them together.

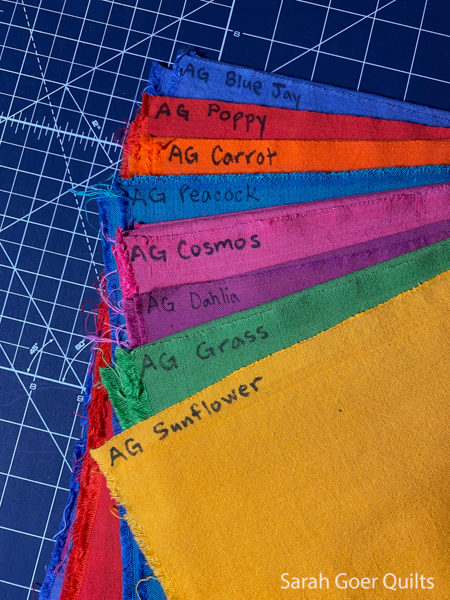
I paired my prints with Alison Glass Kaleidoscope solids. These are the colors I landed on: Blue Jay, Poppy, Carrot, Peacock, Cosmos, Dahlia, Grass, and Sunflower. Tip: Use a sharpie to label the color name on the selvage edge of your solids. I used "AG" here to indicate they are Alison Glass.

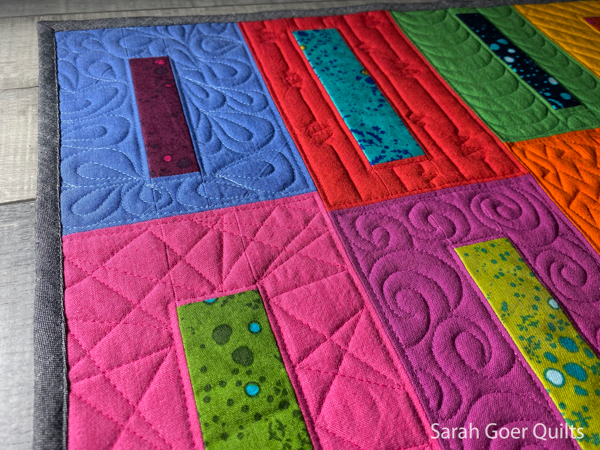
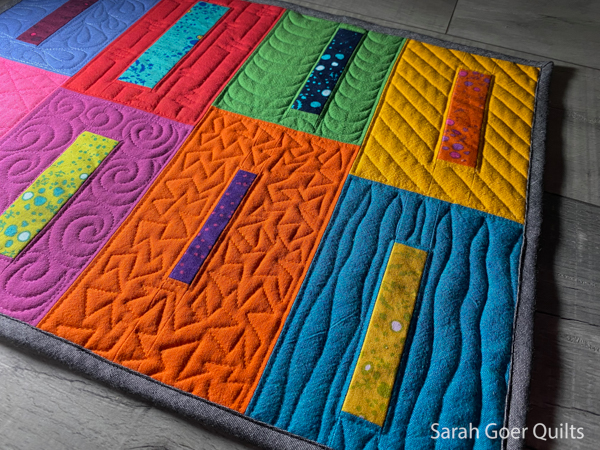
I made a little thumbnail sketch of free motion quilting motifs, choosing four angular and four curvy motifs.

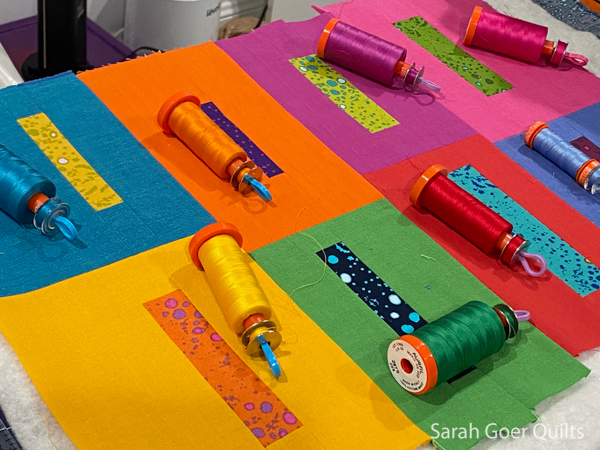
I matched my thread colors to the solid fabrics. I used Aurifil 50wt for the quilting in Light Delft Blue (#2720), Red (#2250), Green (#2870), Yellow (#2135), Fuchsia (#4020), Magenta (#2535), Bright Orange (#1133) and Dark Turquoise (#4182). (Colors listed left to right, top to bottom in their placement in the finished quilt -- see photos below.)

I enjoy using a medley of free motion motifs on a project. My Sunset All About Angles quilt comes to mind as another one that features a wide variety of free motion motifs.

My binding is Alison Glass Kaleidoscope in Charcoal. I attached my bias binding with Aurifil 50wt in Black (#2692) using my machine binding technique.

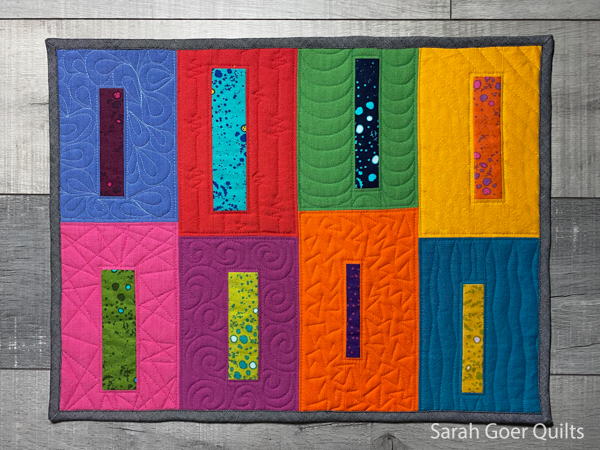
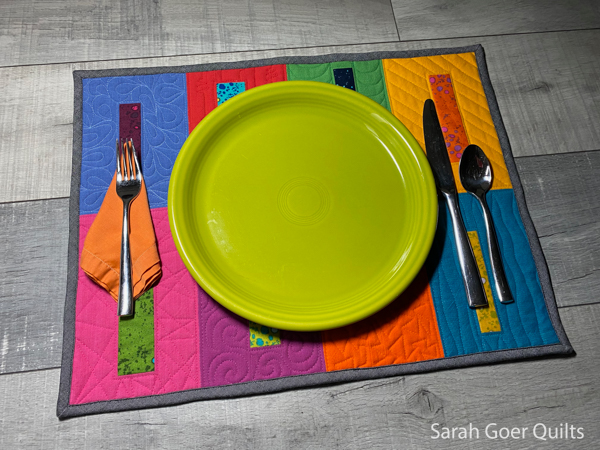
My quilt is trimmed to 14" x 18.5", making it placemat sized. It is my first finish of the new year.

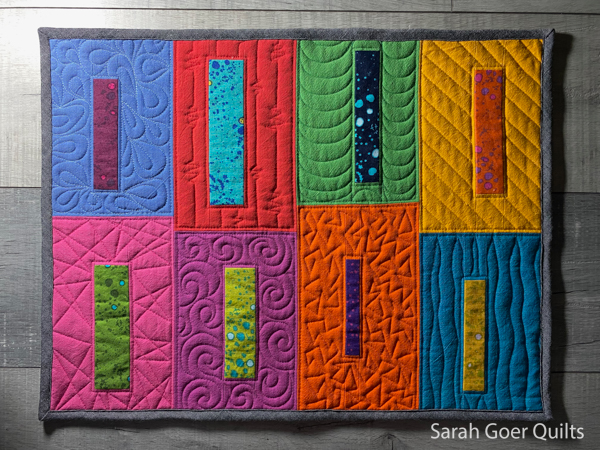
I love the different appearance of the quilting in overhead and side lighting. The shadowy side lighting really shows off the texture.


As a longtime participant of Project QUILTING, I'm excited to be a sponsor this year. Each week as a Weekly Sponsor I have contributed a PDF pattern to one winner. Week 3, I am the Ultimate Weekly Sponsor. The prize is a spot in one of my self-hosted open enrollment live virtual workshops. I'm also a Grand Prize Sponsor. Again, the prize is a spot in one of my self-hosted open enrollment live virtual workshops.

I'm linking up on Kim's blog for the Project QUILTING The First One challenge.

P.S. This blog post is my *first one* of the year. :-)

8 Comments

Hello. It's been a while. I'm happy to be back.

The Other Placemat. Here's a situation of how lacking a deadline really affects getting something done. My Zig Zag Placemat tutorial was published in mid-September. I only finished one of the two placemats in time for publication. The second placemat was pieced in time, but not yet quilted. I finally quilted and finished it at my guild's retreat at the beginning of November. I'm not 100% pleased with the quilting, but it's done. And the wonky part in the middle will be covered by the plate. ;-) Happy to check off another item from the lengthy WIP list and I know the recipients will not be as picky as me about a little wonky quilting.


I'm a member of the Santa Clara Valley Quilt Association and this was the first time I took part in one of their retreats. They do two annual Marin Headlands retreats (where we were) as well as in-town retreats at a local hotel. I highly encourage you to participate in a quilting retreat if you haven't done so yet. I've been a member of this guild on and off since 2002 and over the years I've met a few people from the group at guild events, and more recently through blogs and IG. But this event really changed how connected I feel to the group. (And I got so much done!) The 3-day retreat was a nice long time to get to talk about quilty and other stuff with some lovely women. I look forward to my next retreat! And here are a couple of the pictures I took at the retreat. Such a lovely area!

Thank you for visiting!

I'm linking up to Adrienne's 2015 Q4 Finish Along post. See all my Q4 goals here.

14 Comments

I'm participating in the Mini Charm Challenge, organized by Kylie (@sewkylie on Instagram). Welcome to my tutorial for the Zig Zag Placemat.

Materials (for one placemat)

  • 18 - 2 1/2" squares from a mini charm pack (or cut your own!)
  • 3" x 8" contrasting fabric (white shown)
  • fat quarter of coordinating front fabric (grey/white round stitch shown)
  • fat quarter of backing fabric
  • 14" x 20" piece of batting
  • 62" finished binding (be sure to make a little extra)

For this project I used Fancy by Lily Ashbury for Moda. All of my seams are stitched with a shorter stitch length and 1/4" seam allowance. Seams are pressed open.

Cutting Instructions

Step 1: Cut your contrasting fabric into three 1" x 8" strips.

Step 2: Cut your front coordinating fabric into two pieces, 3 1/2" x 12 1/2" and 9 1/2" x 12 1/2".

Step 3: Cut backing fabric and batting 14" x 20".


Sewing Instructions

Step 1: Choose a layout for your charm squares. Each placemat will use a 3 by 6 array of squares. Here are my layouts for the two placemats I made. The beauty of using a mini charm pack is that everything coordinates perfectly!

Step 2: Stitch the charm squares into "6-packs" so you have three units per placemat, three squares wide by two squares tall. These units should measure 6 1/2" wide by 4 1/2" tall, unfinished.

TIP: To get those seams lined up as perfectly as possible, I press my seams open, and then use a straight pin right through the seams in both layers. Here, you can see what that looks like from the top and bottom. (Note: These pictures were taken from a later step in the process, but the idea is the same to build the 6-packs.)

Step 3: Slice the 6-packs in half, corner to corner. You'll need one to go the opposite direction of the other two. I have two going "downhill" and one going "uphill." I started by marking the center of my block by folding a crease into the middle of the center squares. Then I lined up my straight edge from corner to corner (a bit hard with the pinked edges on the charms) and through that center point made by my crease and the seam.

Step 4: Stitch the 1" strips of zig zag fabric into your 6-packs. The 8" long pieces should be just a smidge longer than your diagonal cut edge of your 6-pack. When lining up edges for sewing, the strip should hang past the edge of the 6-pack equally on each end, roughly 1/8" to 3/16". Piece with an accurate 1/4" seam allowance. This will allow this strip to simply replace the seam allowance and the finished unit should remain 6 1/2" x 4 1/2". Viewing the back of your seam you should see the edges of the strip touching each other.

Step 5: Trim each 6-pack down to 6 1/2" x 4 1/2". This should mostly be trimming of the edges of the strip you've just sewn in.

TIP: Since the edges may be hard to line up accurately, use your ruler to line up the corner square's seams at the 2 1/4" mark in both directions.

Step 6: Piece together your three 6-pack units to create the zig zag. Here are my zig zags for two placemats. These units measure 6 1/2" x 12 1/2". Refer back to my tip in step 2 for lining up seams.

Step 7: Attach the 3 1/2" wide piece to the left of the above unit and the 9 1/2" wide piece to the right. This gives you the full placemat, with an unfinished measurement of 18 1/2" x 12 1/2".

Step 8: Quilt and bind as desired.


Please visit other bloggers in the Mini Charm Challenge:

Sept. 14 - Jennie at Clover and Violet: Curvy Top Pencil Pouch
Sept. 15 - Lisa at Banana Cherie: NaKoa Mini Quilt
Sept. 16 - Me. Thanks for visiting!
Sept. 17 - April at The {Studio} Blog: Mini Charm Baby Bib
Sept. 18 - Nina at Nina with Freckles: Cute as a Button Mini Quilt
Sept. 19 - Konda at Moose on the Porch Quilts: Happy Hexi Flowers Small Quilt
Sept. 20 - Mary at See Mary Quilt: Rainbow Byte Mini Quilt
Sept. 21 - Kylie at Sew Kylie: Patchwork "Sew" Wall Decor