Welcome to my stop on Tutorial Week with Finish-a-Long. I'm sharing my process for using scraps to create pumpkin blocks.


Grab your orange (or yellow or white or whatever color you want your pumpkins to be) scraps. Depending on the size of your scraps and the size of your desired pumpkins you can use your scraps as is (which I've done with my single fabric pumpkins) or you can piece together your smaller scraps to form a scrappy slab (as shown in the large pumpkin) before constructing your pumpkin. You'll also want fabric for a stem and a contrasting background fabric.
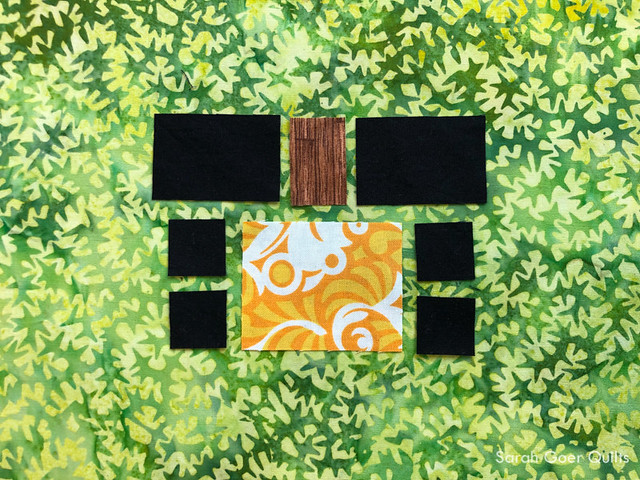
Pumpkins come in a variety of sizes and shapes. Cut the largest rectangle (can be square or not) from your orange fabric.
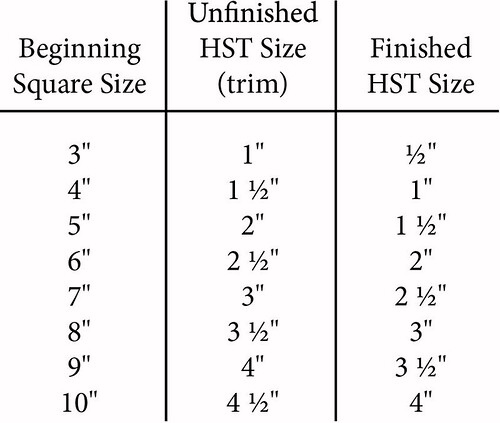
Background is attached to the pumpkin by adding snowball corners to each corner. To determine the size of these background triangles I recommend cutting squares that are 1/5 to 1/3 the length of your pumpkin's shortest side. Make these calculations using finished dimensions. For example, for my 5" x 6" orange rectangle, subtract 1/2" in each dimension for finished size: 4 1/2" x 5 1/2". Next, calculate 1/3, 1/4, or 1/5 of the shortest length, in this case 4 1/2".
1/3 of 4 1/2" (4.5 divided by 3) is 1.5" or 1 1/2"
1/4 of 4 1/2" (4.5 divided by 4) is 1.125" or 1 1/8"
1/5 of 4 1/2" (4.5 divided by 5) is 0.9"
There isn't anything super precise about the choice you make here. The range of these calculations in this example is roughly 1" to 1 1/2". You can round to the nearest 1/4" for friendlier measurements. Then add 1/2" to your choice to get the dimensions of the unfinished square. Cut 4 squares in these dimensions. I used 1" finished (since it is between 0.9 and 1.125), so I cut four 1 1/2" squares for my corners on this pumpkin.

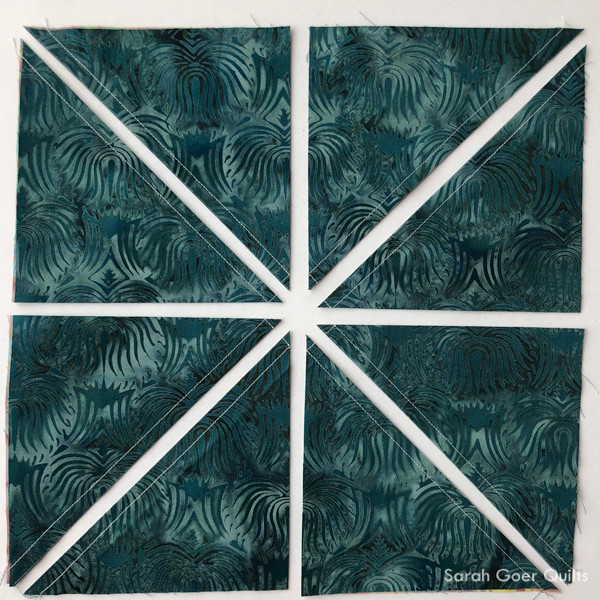
Use your preferred marking tool to mark the diagonal on the back of each of your four background squares, align pumpkin and background fabrics right sides together and sew on the marked diagonal line.


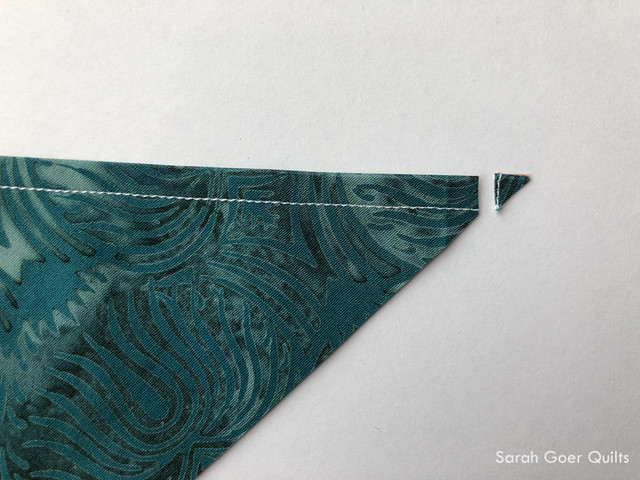
Trim 1/4" from stitching line and press open. (Tip: if you are working with larger pieces, you can sew a second line of stitching 1/2" from the first so that the remnant you trim off is a finished HST as shown in this previous tutorial.)

The simplest stem option is to include a rectangle of brown fabric on the top edge of the pumpkin. (You can experiment with different shaped stems and even add leaves!) For my stems I cut a brown rectangle the same width as the background square above and 1/2" taller. In this case I cut a 1 1/2" x 2" brown rectangle and two 2" strips of background each approximately half the width of the pumpkin. Piece the strip with two background pieces and one stem piece, trim to same width as pumpkin, and attach. You can center the stem on the pumpkin by folding each part to find the centers and align to attach the stem. I just eyeballed it since in nature the stems aren't necessarily perfectly centered.

Add background fabric to bring up to your desired block or mini quilt size.
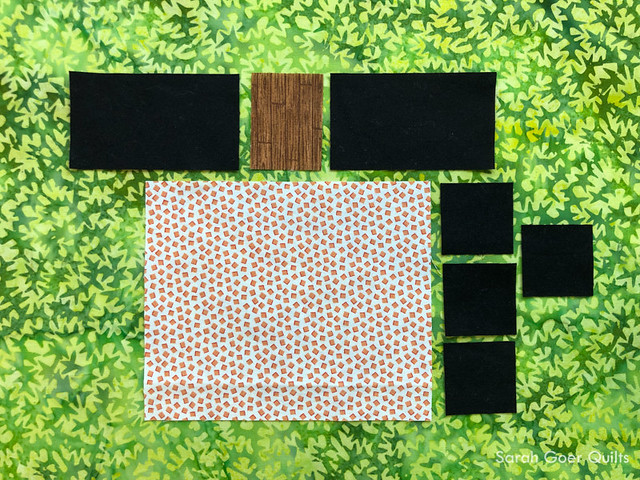
Here's a glimpse of all the pieces (except for background strips).
Bet ya can't make just one!

This mini pumpkin is made from a 2" x 2 1/2" scrap of orange fabric, with 1 3/8" corner squares. The stem is 1 3/8" x 1 7/8".

 This Scrappy Slab version is made from a 6 3/4" x 7 3/4" scrap of orange fabric, with 1 3/4" corner squares. The stem is 1 3/4" x 2 1/4". You can find all my tips for making your own Scrappy Slab in my on-demand class.
Happy Sewing!