When I began quilting, I learned to make bias binding and to finish by hand. Now, my preferred method is to attach the binding completely by machine. Most often, by the time I'm at the binding stage I'm just ready to be done and I really appreciate the speed of this method.
Start by creating your double-fold binding strips, in your desired width. Your binding should be about 10" longer than the perimeter of your quilt. I originally used a 2 1/2" wide binding, then 2 1/4" wide before I settled on 2" as my default. I prefer to cut my binding strips on the bias for a couple reasons. I think it's easier to work with. The bias cut produces binding that has a little give to it. I also think it wears better in the long run for quilts that are going to be used and washed regularly. The give in the bias allows the fibers of the binding to move instead of wear and fray. If your quilt has curved edges, the bias binding will allow you to more easily follow the curve as well. (Note: If you prefer straight grain binding made from width of fabric strips, you can still machine bind!) I recommend that binding strips be connected using diagonal seams to avoid bulk created by straight seams.
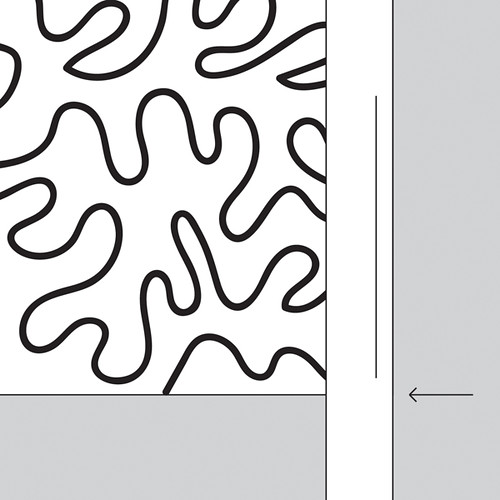
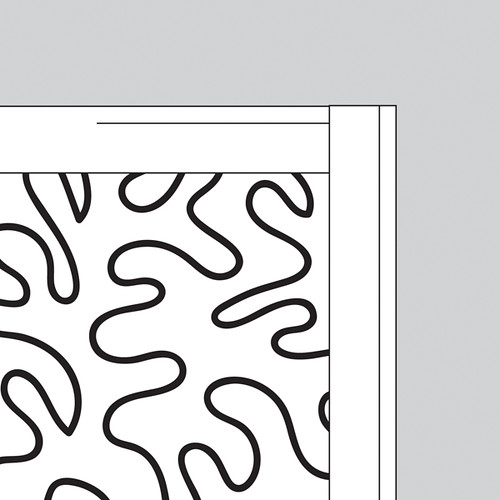
After quilting and trimming your quilt (the white stippled section of diagram is the quilt, the grey is the table), begin by stitching your binding to the edge of the back of your quilt. Use your 1/4" foot and normal stitch length and start in the middle of an edge of your quilt. Leave about 10" of binding loose before you start sewing. I use Aurifil 50 wt. for attaching my binding. Align the raw edge of your binding strip to the edge of the trimmed quilt. Attach binding to the first side of your quilt. Stop 1/4" from the corner of the quilt and backstitch. (The arrow in the diagram shows where the corner of the quilt is.)
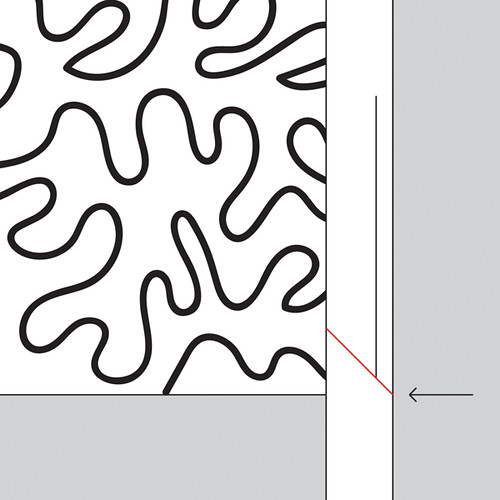
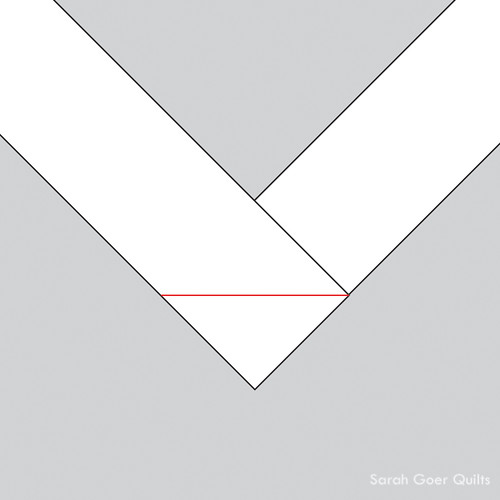
Fold the binding at a 45 degree angle. The fold should line up with the edge of your stitching and the corner of the quilt. (The first diagram shows fold line in red. The second diagram shows binding folded on this line.)
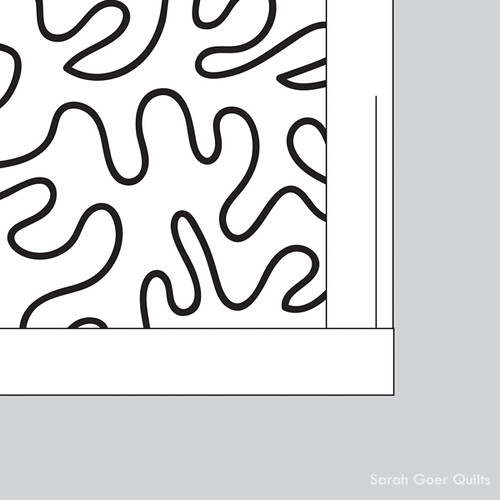
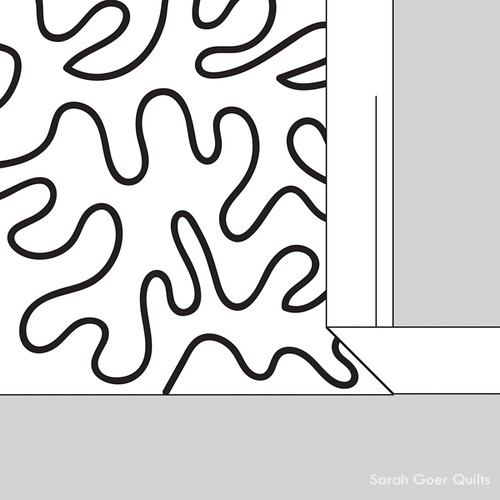
Then fold the binding back along the first edge of the quilt so the raw edge of the binding is along the second side of the quilt. Be sure that this second fold goes just past the edge of the quilt. I like to use a wonder clip (see in photo below) to hold that folded edge while I begin sewing the next edge.
Starting at the edge of side two, stitch using your 1/4" foot and normal stitch length. Continue with this method until you have turned all four corners.
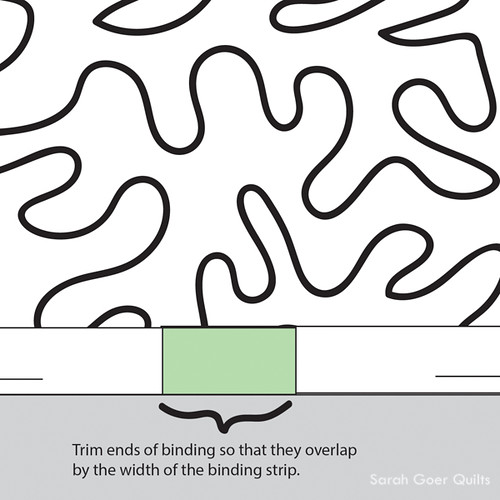
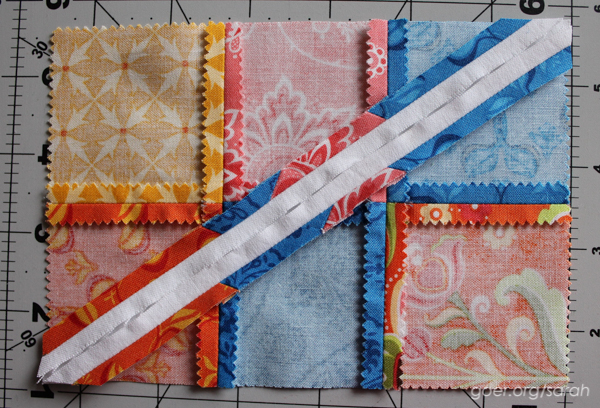
When you are about 12-18" from your starting point, backstitch and trim threads. Lay your quilt flat with the loose ends of the binding strips overlapping along the edge of the quilt. Cut your ends of your binding strips so that they overlap by the width of a strip (shown in green above). My ends overlap 2". (Note: Remember that if your binding strips are 2 1/2" wide you should have a 2 1/2" overlap.) I find it helpful to cut off a small chunk of binding from the end of the strip and use it as a guide to measure this width to trim the ends of the binding.
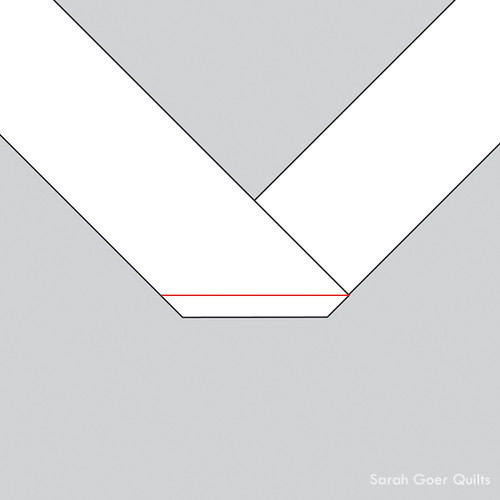
Unfold the binding and pin the ends right sides together at a right angle and mark a 45-dgree line on the unfolded, wrong side of one end of the binding (shown in red on the diagram). Check to be sure that binding will lay flat without any twists when this seam is sewn. Sew on the line with a reduced stitch length. Trim off excess fabric, 1/4" from stitching line. Finger press seam open, then fold binding to lay flat and press with an iron. Stitch remaining edge of binding to quilt.
Press binding away from quilt. Press each edge close to corners, but do not press the corners.
This is what the self-mitered corner looks like on the bottom of the quilt.
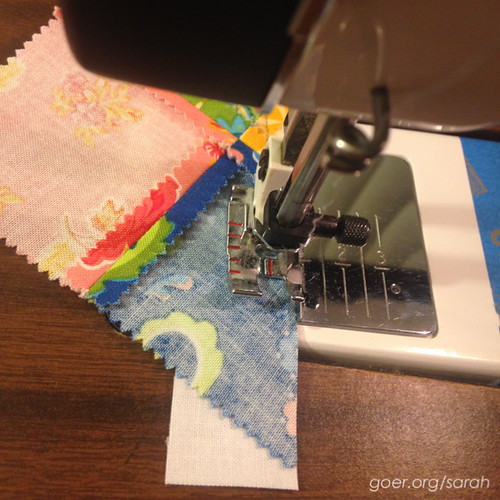
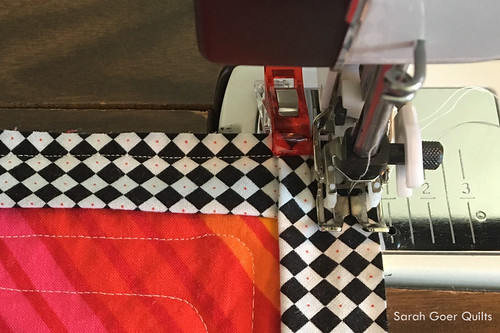
For the second pass around the quilt I switch to my standard clear-view foot and I like to position my needle to the far left so the foot is level on the binding. Increase stitch length to 3.0 - 3.5. I start by using just a few wonder clips (you could also use pins) to hold the binding in place on the top of the quilt. I don't clip/pin the entire perimeter as I prefer to adjust the binding as I stitch and use a stiletto to move and guide the binding layer as it feeds into the machine. If you don't have a stiletto, a long, heavy duty straight pin, like the Clover Flower Head Pins, works well for me.
With the binding pulled taut over the edge of the quilt, stitch 1/16" to 1/8" from the folded edge of the binding. Your stitching will be visible on the back of the quilt. The width of your binding strips and where your stitching falls in this step will determine how far away from your binding edge the stitching will be on the back. This part is a bit of an art. Use a little trial and error to find a look that you're happy with on front and back. See my finished example in the last photo below.
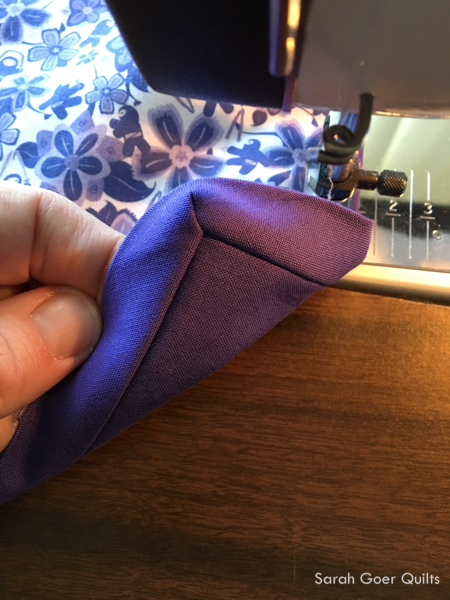
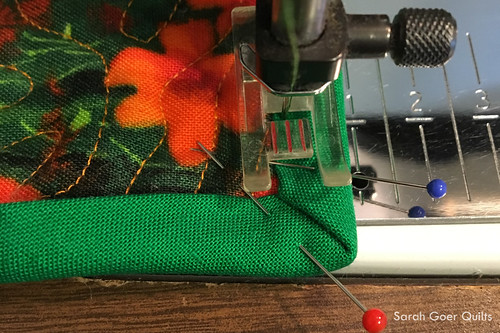
As you approach the corner, you'll have to prepare the binding. I usually do this when the corner makes it onto my sewing table, about 6" from the needle.
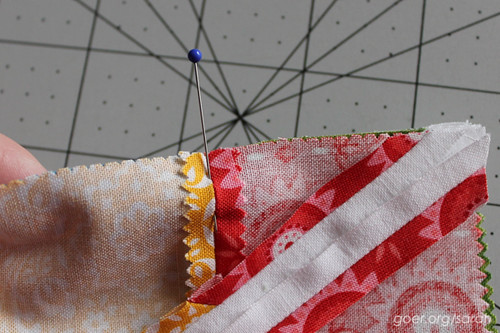
Start by folding up the bottom edge, then fold the right edge of the binding over the top. I use a straight pin to hold the first fold in place along the right edge of the binding so that when I fold over the right side the seam meets at a 45 degree angle.
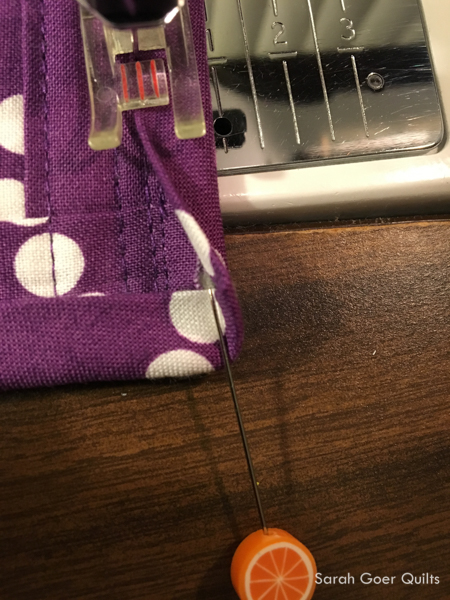
Once you're happy with where the corner seam falls, pin the binding in place. (I prefer pins to clips here because I can sew really close to the pin before needing to remove it.)
As I approach the corner, I stitch right up to the pin before removing it.
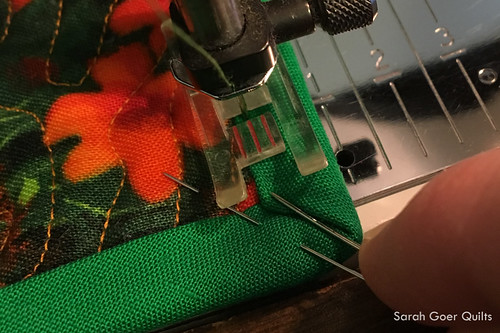
Once I remove the pin, I use a stiletto or flower head pin to guide the fabric. Stop in the needle down position one stitch past the corner of the seam.
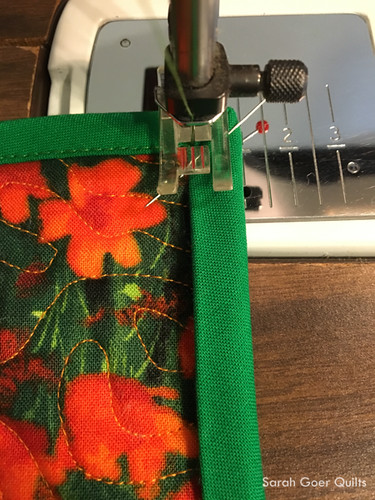
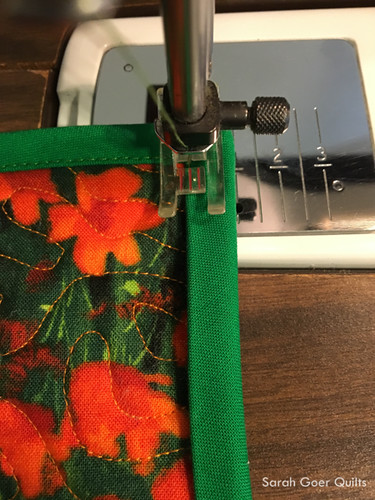
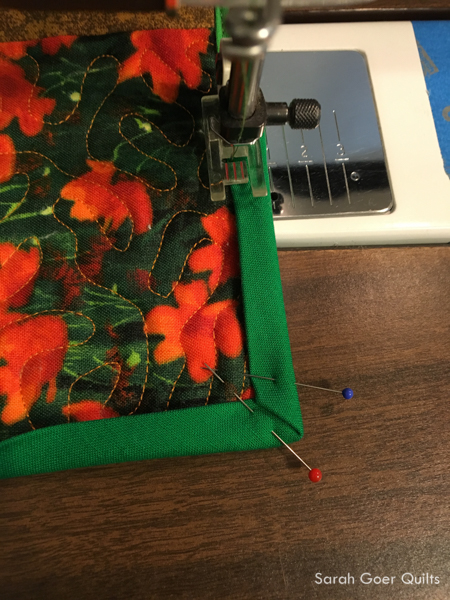
Rotate the quilt and continue on the second side, removing the last pin after a stitch or two (and without sewing over it). You should be able to continue around the entire perimeter of the quilt without breaking thread. I backstitch once I get to where I started.
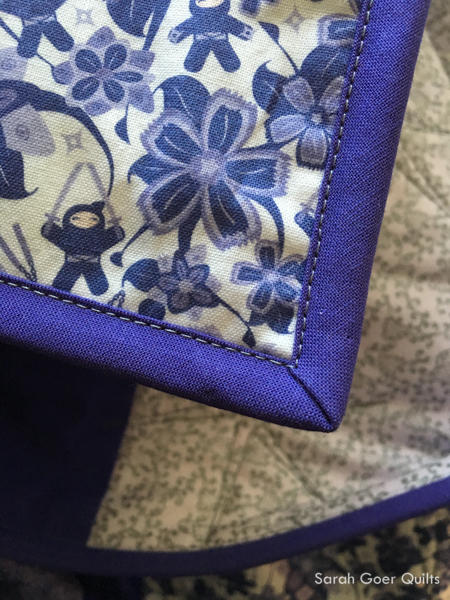
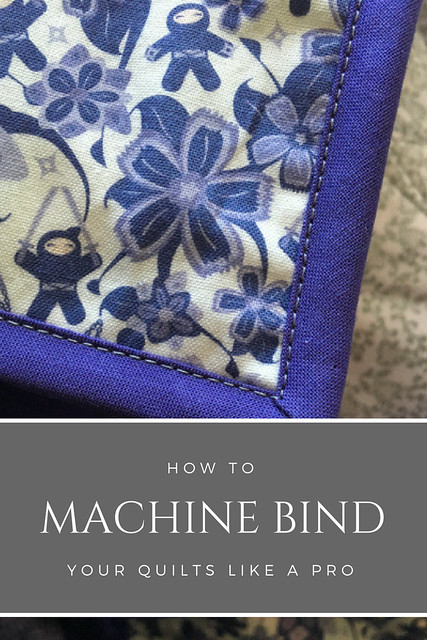
Tada! Here's the top view of the finished binding. (Adorable Ninja fabric by Elishka Jepson.)
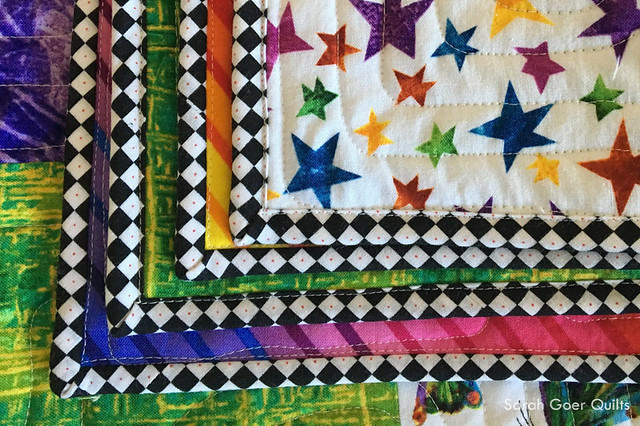
Here's a view of both sides of the finished binding. The rainbow striped fabric is the backing. You can see the line of stitching visible on the backing fabric from attaching the binding.
Please don't hesitate to ask any questions or let me know where you wish there was another photo or diagram.
If you want to see the full view of the quilts used in this tutorial, check out my Purple Ninja Quilt, Wizard of Oz Baby Quilt, Caterpillar Fizz, and Racoon Envelope Mini.
![]() In case you're new here, I send out a newsletter every 2-3 weeks. Sign up here to receive color and design inspiration straight to your inbox and don't miss a beat about what's going on at Sarah Goer Quilts.
In case you're new here, I send out a newsletter every 2-3 weeks. Sign up here to receive color and design inspiration straight to your inbox and don't miss a beat about what's going on at Sarah Goer Quilts.
This tutorial was shared as part of the 2017 Back to School Blog Hop for Sewists with Sam Hunter. Below are links to the tutorials by the other participants.
Day 1 – August 15 – Sam Hunter: How to spray baste a BIG quilt
Day 2 – August 16 – Mandy Leins: Thread Dread: removing stray bits after quilting
Day 3 – August 17 – Nancy Stovall: Batting Choices - The Sweet Creamy Filling
Day 4 – August 18 – Ebony Love: 7 Indispensable feet for your sewing machine
Day 5 – August 19 – Michelle Freedman: Machine throat plates
Day 6 – August 20 – Teresa Coates: What's What: Top-stitching, Edge-stitching, Under-stitching
Day 7 – August 21 – Kelly Cole: Getting your Sew-Jo Back
Day 8 – August 22 – Megan Dougherty: Choose to Fuse: tips for working with fusibles for applique
Day 9 – August 23 – Kim Lapacek: Tricks to being productive while hauling your kids around
Day 10 – August 24 – Yvonne Fuchs: Circuitboard quilting on Domestic and Longarm Machines
Day 11 – August 25 – Sandi Hazlewood: Chain Piecing Quilt Blocks Tips
Day 12 – August 26 – Juliet van der Heijden: Teaching a Child to Paper Piece
Day 13 – August 27 – Maddie Kertay: How to Fold Fabric for Versatile Storage
Day 14 – August 28 – Cath Hall: Working with Lawn Fabric
Day 15 – August 29 – Tracy Mooney: Tips for the Perfect Seam
Day 16 – August 30 – Teri Lucas: How to Bury Thread
Day 17 – August 31 – Debby Brown: Securing Machine Quilting Knots
Day 18 – September 1 – Flaun Cline: How to put some sparkle in your fabric pull (part 1)
Day 19 – September 2 – Jessica Darling: How to put some sparkle in your fabric pull (part 2)
Day 20 – September 3 – Trish Frankland: A bigger blade really IS better?!
Day 21 – September 4 – Robin Koehler: Tips on how to travel with handwork
Day 22 – September 5 – Jane Davidson: How to make scrappy HSTs
Day 23 – September 6 – Linda Pearl: Low cost tips for organizing your sewing room
Day 24 – September 7 – Christa Watson – Top 10 tips for quilting on a domestic machine
Day 25 – September 8 – Sarah Nunes: To Starch or Not to Starch
Day 26 – September 9 – Suzy Webster: Testing fabric for bleeding
Day 27 – September 10 – Sarah Goer: Machine bind your quilts like a pro – You are here!
Day 28 – September 11 – Vanda Chittenden: Beginner paper-piecing tips
Day 29 – September 12 – Cheryl Sleboda: Needle threading tips
Day 30 – September 13 – Kim Niedzwiecki – Different thread weights and when to use them
Day 31 – September 14 – Sandra Healy: Conquer Your Fear of Machine Appliqué
Day 32 – September 15 – Sandra Starley: Tips for Collecting Antique Quilts
I've linked up to Tips and Tutorials Festival.