
Hello and welcome to my stop for TGIFF! I look forward to seeing what you’ve finished this week. Be sure to link up your finish below.
I opted for a super fast finish to share with you. Keep reading for all the tips on my process for making this pillowcase style gift bag.

I was recently given four Hanukkah fabrics (thank you Erin!) which I’m excited to have for making reusable gift bags. For years we’ve been using and reusing three Hanukkah gift bags. This works great since we give three gifts each night in our household. (Two kids, and my husband and I alternate gifts each night.) However, my kids have expressed a preference for having all eight of their gifts wrapped by the first night so that they can choose from the pile each night. So… I’ll be working toward having at least 17 reusable bags (which won’t happen this year).
The beauty of this technique is that you can do it with almost any size piece of fabric. Today’s bag was made from a half yard of fabric. I began by folding the fabric in half, wrong sides together with selvages touching. I pressed to crease the fold. Then I trimmed both cut edges to square up the fabric and trimmed off the selvage edges. This left me with a folded rectangle that measured approximately 20” x 17”.

After trimming I sewed a hem on each edge where I trimmed off selvage. (An alternative, and even faster option, would be to leave the selvage on and skip hemming.) My hem was made by folding 1/4”, pressing, then folding a second time and pressing again. My second fold was about 5/8” from the first fold, but as long as it’s a little bigger than 1/4” it’ll work. Once pressed, I stitched with a 3.5 stitch length approximately 1/8” from each fold. I do this with the wrong side of the fabric facing up so I’m sure to not miss the edge of the hem. I used Aurifil 50wt Medium Blue (#2735).
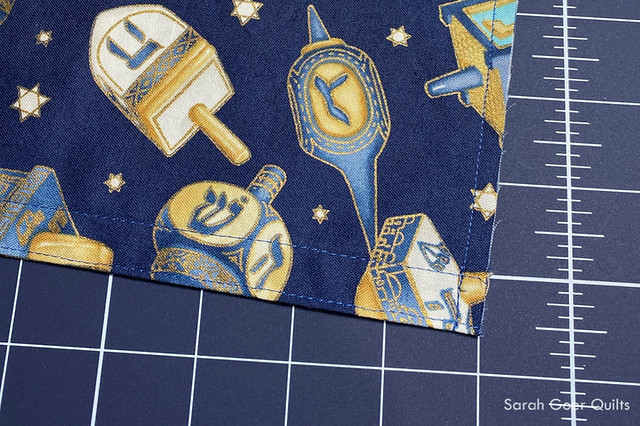

With wrong sides together, I stitched each side seam using a ¼” seam allowance, backstitching at the beginning and end. Then I trimmed that seam allowance down to 1/8”.


Next, I turned it inside out. I worked the corners out using a chopstick and pressed the seam to help avoid the fabric slipping while I sew. Then I sewed the two seams again, this time with right sides together. This step envelops the raw edges in the seam. Tada! French seam! If you find that you aren’t catching the raw edges in your seam, try stitching 3/8” from the edge in this step.
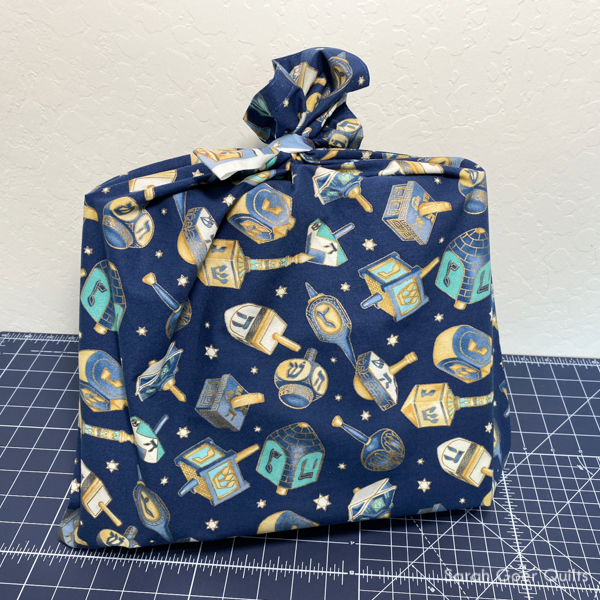
Flip right side out. Press the seams. Add a closure (hook and loop tape or a ribbon) if desired. (We usually just fold over the edge, but I’ve been known to tie closed with a strip of selvage, as shown. A chip clip works, too!)

Happy Holidays!


Alison V.
That's so adorable!
sarah
Post authorThank you, Alison. Adorable and quick & easy. A great combination!
Elvira
Love the fabric and the pillow style bag! That kind of bag really versatile :)
sarah
Post authorIndeed! And can be made to fit anything! :-) Thanks for visiting, Elvira!
Susan
Great idea Sarah!
sarah
Post authorThanks, Susan! Time's a ticking... I've pulled out all my Hanukkah fabric to turn into bags in the next couple weeks. Glad they are a quick sew. :-)
Anja @ Anja Quilts
I have to agree with the kids -- need to be able to choose the gift LOL Reusable bags are a great idea.
sarah
Post authorIt'll be fun this year, but a little different. Historically I've given them each legos to open the same night and each books to open the same night, etc. Thanks for visiting, Anja.
Kathleen Scargle McCormick
Great tutorial and I love when the kids have great ideas!
sarah
Post authorIndeed. I'm trying to think of creative ideas for having all 16 gifts available since I won't likely have 16 bags ready by then. I'm thinking some can be a note in an envelope that tells them where a gift is hidden. Risky, but it could work. Thanks for visiting, Kathleen.