
Earlier this month I shared my newest project. At that point it was a stack of 1 1/2" x 1 1/2" and 1 1/2" x 2 1/2" pieces. Some progress has been made. I cut out all my Kona Snow background pieces and got everything up on the design wall.
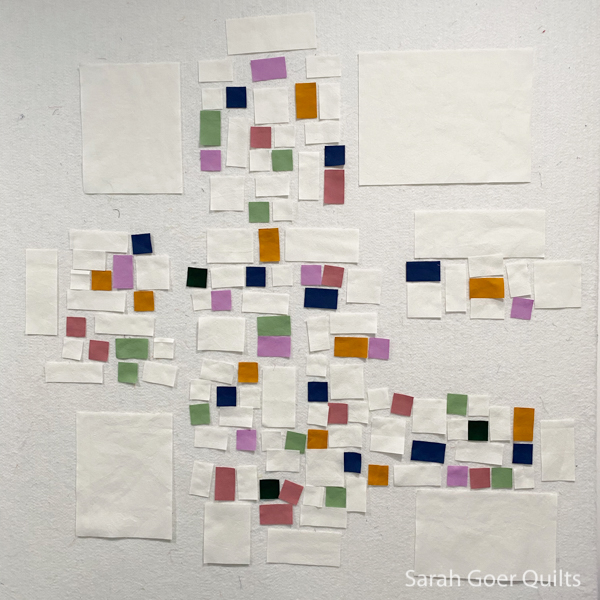
My graph paper "pattern" is meticulously labeled. (You can see the beginning sketch, before labeling, in my previous post.) All of these pieces will go into nine sections before those are combined. I like to chain piece, sewing many seams one after another another without breaking thread. I find this assembly line style piecing to be faster than sewing one seam at a time. Here's my latest batch from this evening.
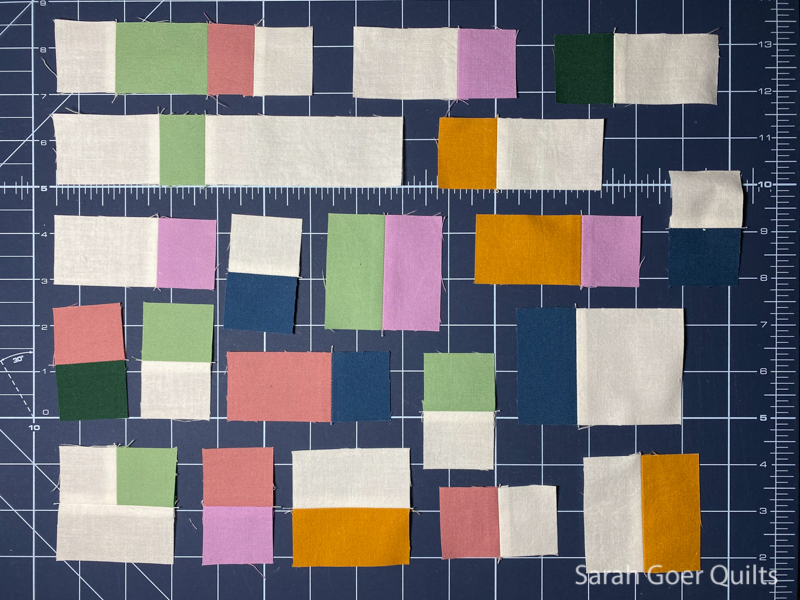
I use my reference guide to put all the pieces back in their proper places on the design wall once the seams are pressed. Then I repeat the process. I've been through a few rounds of piecing, but still have a long way to go. At least things start to come together faster as the sections get larger. :-)


Nancy
Sarah, I am trying to learn your process. When you put the pieces back on the design wall it seems you just place them. There does not seem to be a graph behind them at this stage. Am I correct that you just rely on your “eye” compared to your sketch on graph paper? Also, what is your design wall mounted on, please?
This butterfly is going to be spectacular. Keep going quickly. We will need its beauty in the dead of January
sarah
Post authorThank you for your interest, Nancy. Yes, there's no grid on my design wall. Everything is on the wall in relation to the pieces they connect to, according to my drawing. This shrinks up as I sew pieces, so I'll readjust as needed. My graph paper (not shown) is a scale drawing of the finished pieces, so I can look to see "a windsor 1x1 square needs to be here, sewn to a white 1x1 square" on the drawing and place the proper piece in that location on the wall. For this purpose I don't usually pick up every pair of fabrics in the same area to sew. I take a few from each section of the wall so I'll have lots of reference pieces around those gaps for putting them back. Obviously this gets easier as I get bigger sections together.
My design wall is two 4-foot by 8-foot insulation boards covered in (maybe twin sized) batting, adhered with duct tape on the back. My studio doesn't have a wall big enough for a sizable permanent design wall, so I can have these two panels next to each other leaning in a couple relatively convenient orientations. Or I can lean one in front of the other if I only need a smaller space. I made them years ago and I really love them. The biggest disadvantage is that since they aren't adhered to the wall (which they could be) they bow a little. But I can stick pins in them. They are lightweight. And I can fit them in my minivan (which was important for purchasing, and I've moved them).
My goal is to finish this mini quilt by the end of December. It will only be about 24" x 24".